Hoover SmartWash Instructions: A Comprehensive Guide (Updated December 21, 2025)
This guide simplifies carpet cleaning with the Hoover SmartWash, removing guesswork and offering professional results at home. It details setup, operation, and maintenance.
The SmartWash tackles pet messes effectively, making carpet care simpler for every owner. Discover how this intuitive machine delivers a deep, thorough clean.
This manual provides a complete overview of your new Hoover Smartwash, including installation, operation, troubleshooting, and parts diagrams for optimal performance.
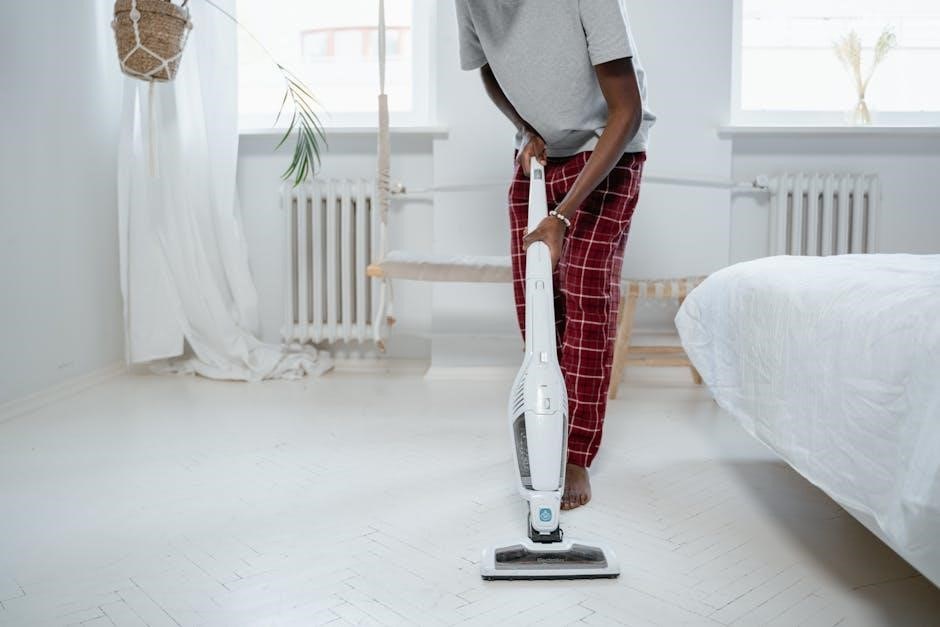
The Hoover SmartWash represents a significant advancement in home carpet cleaning technology, designed to deliver professional-level results with unparalleled ease of use. Unlike traditional carpet cleaners that often require significant effort and guesswork, the SmartWash automates much of the process, making deep cleaning accessible to everyone.
This innovative machine is built with a user-friendly design, resembling a conventional vacuum cleaner in its upright form, eliminating the need to bend or strain during operation. It’s particularly beneficial for pet owners, effectively tackling embedded dirt, stains, and odors often associated with pets. The SmartWash promises to simplify carpet maintenance, transforming a traditionally arduous chore into a quick and efficient task.
This comprehensive guide will walk you through every aspect of using your Hoover SmartWash, from initial setup and component identification to detailed operating instructions and essential maintenance procedures. Prepare to experience a cleaner, fresher home with minimal effort!
Unboxing and Component Identification
Upon unboxing your Hoover SmartWash, carefully inspect the contents to ensure all components are present. You should find the main SmartWash unit, the clean water tank, and the dirty water tank. The handle is typically pre-attached, but verify its secure connection. The specialized cleaning nozzle is a key component, designed for effective dirt extraction.
Included accessories will vary depending on the model, but generally include a cleaning solution specifically formulated for the SmartWash system. Additional tools, such as a crevice tool or upholstery brush, may also be provided for tackling specific cleaning challenges. Refer to the included parts list to confirm all items are accounted for.
Familiarizing yourself with these components before assembly will streamline the setup process and ensure optimal performance from your new carpet cleaner.
Identifying Key Parts: Handle, Tank, Nozzle

The handle of the Hoover SmartWash is ergonomically designed for comfortable maneuvering during cleaning. It often features intuitive controls for power and mode selection. The tanks – clean and dirty water – are clearly labeled and easily removable for filling and emptying. Pay attention to the maximum fill lines indicated on each tank.
The nozzle is a critical component, engineered to deliver cleaning solution and extract dirty water effectively. It’s designed to glide smoothly across carpet fibers, lifting embedded dirt and stains. Inspect the nozzle for any obstructions before each use. Understanding the function of each part ensures efficient operation.
Proper identification of these key parts will aid in assembly, operation, and maintenance of your Hoover SmartWash.
Included Accessories: Solution, Tools
Your Hoover SmartWash package includes a specialized cleaning solution formulated to work with the machine, effectively lifting dirt and stains without leaving residue. Always use the recommended solution for optimal results and to avoid damaging the machine. Additional tools may be included, such as a crevice tool for reaching tight spaces.
Some models come with a pre-treatment wand to tackle stubborn stains before deep cleaning. A storage bag for accessories is also often provided, keeping everything organized. Familiarize yourself with each accessory and its intended use. Proper utilization of these tools enhances the cleaning power of your SmartWash.
Refer to the included documentation for a complete list of accessories and their specific applications.
Initial Setup: Preparing for First Use
Before your first cleaning session, carefully unpack your Hoover SmartWash and ensure all components are present. This initial setup is crucial for optimal performance. Begin by reviewing the included safety instructions and user manual to understand the machine’s features and limitations.
Next, assemble the unit according to the diagram provided. Proper assembly ensures stability and efficient operation. Before filling the tanks, inspect all connections for secure fitting. This prevents leaks during use. Preparing the machine correctly sets the stage for a successful and effortless cleaning experience.
Take a moment to familiarize yourself with the control panel before proceeding.
Assembling the Hoover SmartWash
The Hoover SmartWash boasts a user-friendly assembly process, designed for quick and easy setup. Begin by securely attaching the handle to the main unit, ensuring it clicks firmly into place. Next, connect the cleaning nozzle to the base of the machine; a proper connection is vital for effective solution distribution.
Double-check all connections to guarantee a stable and leak-proof assembly. Refer to the parts diagram in the user manual if needed. A correctly assembled SmartWash will operate smoothly and efficiently, maximizing cleaning performance. This straightforward process allows you to quickly transition from unboxing to deep cleaning.
Filling the Clean and Dirty Water Tanks
Properly filling the tanks is crucial for optimal cleaning. The clean water tank accepts warm tap water and the Hoover SmartWash cleaning solution – never use excessive suds. Carefully pour the solution, following the fill line indicated on the tank, to avoid overfilling.
The separate dirty water tank collects the extracted grime. Ensure this tank is securely in place before operation. Regularly check the dirty water tank’s fill level during cleaning, emptying it as needed to maintain suction and prevent overflow. This separation keeps dirty water from recirculating, ensuring a truly clean carpet.
Understanding the Control Panel
The Hoover SmartWash features an intuitive control panel designed for ease of use. The power button initiates the machine, while mode selection allows you to choose between Deep Clean, Quick Clean, and other specialized settings. Indicator lights clearly display the selected mode and operational status.
A trigger on the handle activates the cleaning solution spray. The panel also includes controls for the pre-treat function, enabling targeted stain removal. Familiarizing yourself with these controls ensures you can customize your cleaning experience for optimal results on various carpet types and soil levels.
Operating Instructions: Basic Carpet Cleaning
Begin by selecting the appropriate cleaning mode based on your carpet’s soil level. For general cleaning, a standard mode is sufficient. Activate the solution spray by depressing the trigger on the handle as you begin your first pass.
Employ a slow, deliberate forward and backward pass technique, overlapping each stroke slightly to ensure comprehensive coverage. Avoid excessive saturation; the SmartWash is designed to deliver optimal cleaning with controlled moisture. Continue this process until the desired area is thoroughly cleaned, releasing the trigger when not actively cleaning.

Selecting the Appropriate Cleaning Mode
The Hoover SmartWash offers versatile cleaning modes tailored to different carpet conditions. For lightly soiled carpets or quick refreshes, utilize the ‘Quick Clean’ mode, minimizing water usage and drying time.
Heavily soiled areas or carpets with embedded dirt require the ‘Deep Clean’ mode, providing increased suction and solution dispensing for a more thorough clean. Always assess the carpet’s condition before selecting a mode. Consider pet messes or high-traffic areas when making your choice, ensuring optimal cleaning performance and preventing over-saturation.
Forward and Backward Pass Technique
Effective carpet cleaning with the Hoover SmartWash relies on a simple, yet crucial technique: the forward and backward pass. Push the machine forward to apply the cleaning solution, then slowly pull it backward to extract the dirty water.
Avoid rushing this process; overlapping each pass slightly ensures complete coverage and optimal soil removal. This dual-action method lifts and extracts dirt effectively, leaving carpets cleaner and drier. Repeat this technique several times over stubborn stains or heavily soiled areas for best results. Remember, slow and steady wins the cleaning race!
Deep Cleaning Mode: For Heavily Soiled Carpets
When facing significant dirt and grime, activate the Deep Cleaning Mode on your Hoover SmartWash. This setting increases the amount of cleaning solution dispensed and extends the extraction time, providing a more thorough clean.
Utilize slower passes with this mode, allowing the machine ample time to work the solution into the carpet fibers and lift away embedded soil. Multiple passes, overlapping each one, are highly recommended for optimal results. This mode is ideal for high-traffic areas and carpets that haven’t been cleaned in a while, restoring them to their former glory.
Quick Clean Mode: For Light Refreshing
For carpets needing a quick refresh, the Hoover SmartWash’s Quick Clean Mode is your solution. This setting uses a minimal amount of cleaning solution and faster extraction, making it perfect for routine maintenance and light soiling.

Employ faster, more fluid passes across the carpet surface. This mode is designed to revitalize carpets between deep cleans, removing surface dirt and odors without leaving excessive moisture. It’s an excellent choice for weekly upkeep or addressing minor spills promptly, keeping your carpets consistently fresh and inviting.
Using the Pre-Treat Function
For heavily soiled areas or stubborn stains, the Hoover SmartWash’s pre-treat function significantly enhances cleaning effectiveness. Apply the Hoover pre-treatment solution directly onto the affected area, allowing it to penetrate and loosen dirt and grime for several minutes before using the machine.
After pre-treating, select an appropriate cleaning mode – Deep Clean is often recommended – and slowly glide the SmartWash nozzle over the treated spot. The machine will then extract the loosened debris, leaving your carpet noticeably cleaner. This function is invaluable for pet stains, food spills, and high-traffic zones.
Cleaning Upholstery with the SmartWash
The Hoover SmartWash isn’t limited to carpets; it’s also excellent for refreshing upholstery! Utilize the included upholstery tool, attaching it securely to the machine’s nozzle. Before starting, always test a hidden area of the fabric to ensure colorfastness and compatibility with the cleaning solution.
Select a gentle cleaning mode, like Quick Clean, and lightly mist the upholstery surface. Avoid over-saturation, as this can lead to prolonged drying times. Use slow, overlapping passes with the upholstery tool, and allow the SmartWash to extract the dirt and moisture. This revitalizes furniture, removing odors and stains effectively.
Troubleshooting Common Issues
Encountering problems? If your SmartWash isn’t powering on, first check the power cord connection and ensure the outlet is functioning. Verify the water tanks are correctly seated; a loose connection can prevent operation. If solution isn’t dispensing, confirm the clean water tank isn’t empty and the solution valve is open.
Also, inspect the solution lines for any kinks or blockages. For persistent issues, consult the full user manual for detailed diagrams and further troubleshooting steps. Regular maintenance, like cleaning brushes and tanks, can prevent many common problems and extend the machine’s lifespan.
Machine Not Powering On
If your Hoover SmartWash fails to power on, begin with the simplest checks. Ensure the power cord is securely plugged into both the machine and a functioning electrical outlet. Test the outlet with another device to confirm it’s providing power. Next, verify that the clean and dirty water tanks are properly seated and locked into place.
A loose tank connection can interrupt the power supply as a safety feature. Inspect the power cord for any visible damage, such as cuts or fraying. If problems persist, consult the comprehensive user manual for detailed diagrams and further assistance.
Solution Not Dispensing
If your Hoover SmartWash isn’t dispensing cleaning solution, first confirm the clean water tank contains an adequate amount of the recommended solution. Ensure you’re using a Hoover-approved cleaning formula, as others may cause clogging or damage. Check the solution dispensing nozzle within the tank for any blockages or debris.
Next, verify the spray trigger on the handle is fully depressed during operation. A partially engaged trigger may restrict solution flow. If the issue continues, consult the user manual for instructions on flushing the solution lines to remove potential obstructions and restore proper dispensing.
Maintenance and Care
Regular maintenance ensures optimal performance and extends the life of your Hoover SmartWash. After each use, thoroughly rinse the clean and dirty water tanks with clean water, preventing mildew and odor buildup. Periodically remove and clean the brushroll, removing any hair, fibers, or debris that may have accumulated.
Inspect the nozzle for clogs and clear any obstructions. A clean brushroll and nozzle guarantee effective cleaning. Following these simple steps will keep your SmartWash functioning efficiently, delivering consistently clean carpets and upholstery for years to come. Refer to the manual for detailed cleaning instructions.
Cleaning the Brushes and Nozzle
To maintain peak performance, regularly clean the Hoover SmartWash’s brushes and nozzle. Begin by disconnecting the machine from the power outlet. Remove the brushroll and carefully clear away any accumulated hair, threads, or debris using scissors or a seam ripper. Inspect the nozzle for blockages and remove any obstructions.
Rinse both the brushroll and nozzle with warm water, ensuring all residue is removed. Allow them to air dry completely before reinstalling. A clean brushroll and nozzle are crucial for effective dirt and stain removal, ensuring your carpets receive a thorough cleaning every time.
Emptying and Cleaning the Tanks
After each use, properly emptying and cleaning the Hoover SmartWash’s tanks is essential for hygiene and optimal performance. Carefully remove both the clean and dirty water tanks. Dispose of the dirty water responsibly, avoiding drains that could be clogged by debris.
Rinse both tanks thoroughly with warm water, removing any remaining solution or sediment. For stubborn residue, a mild detergent can be used, ensuring it’s completely rinsed away. Allow the tanks to air dry completely before reattaching them to the machine. Regular tank cleaning prevents odors and ensures fresh cleaning solution.

Storage Instructions
Proper storage extends the life of your Hoover SmartWash. Before storing, ensure both the clean and dirty water tanks are completely empty, rinsed, and dry to prevent mold or mildew growth. Wrap the power cord neatly to avoid damage and tripping hazards.
Store the SmartWash in a cool, dry place, away from direct sunlight and extreme temperatures. Avoid storing it in damp environments like garages or basements. Keep the machine upright to prevent any residual water from damaging internal components. Secure any loose attachments or accessories with the unit.
Hoover SmartWash Pet Specific Features
The Hoover SmartWash excels at tackling pet messes, a common challenge for many households. Specifically designed features address stubborn pet stains and odors effectively. The powerful suction and specialized cleaning solutions lift and remove embedded dirt and allergens left behind by furry friends.
Certain models, like the FH53010 Pet Complete, include enhanced tools for pet hair removal and odor neutralization. These features ensure a deeper clean, leaving carpets fresh and hygienic. Regular use of these pet-specific capabilities maintains a cleaner, healthier home environment for both pets and owners.
Safety Precautions
Always disconnect the Hoover SmartWash from the power outlet before any maintenance or troubleshooting. Never operate the machine with a damaged cord or plug. Avoid using outdoors or on wet surfaces to prevent electric shock.
Do not allow children to operate the SmartWash unsupervised. Keep hands and feet away from the rotating brush roll during operation. Only use Hoover-approved cleaning solutions to avoid damaging the machine or creating hazardous fumes. Ensure proper ventilation when cleaning with solutions.
Never suction flammable or combustible materials.
Warranty Information
Your Hoover SmartWash carpet cleaner is covered by a limited warranty against defects in materials and workmanship, beginning from the date of original purchase. The standard warranty period is typically one (1) year for parts and labor.
However, specific warranty terms may vary depending on the model (e.g., FH52002, FH53010) and the region of purchase. Extended warranties are often available for purchase, providing additional coverage beyond the standard period.
To make a warranty claim, retain your proof of purchase and contact Hoover customer support. The warranty does not cover damage caused by misuse, abuse, or unauthorized repairs.