Welcome! This guide provides a comprehensive overview of the Nikon EM, helping you unlock its full potential․ Explore features detailed in the manual․
The Nikon EM, designed for both beginners and enthusiasts, offers a blend of automatic and manual control․ Access the PDF manual online for detailed instructions․
Compatible with Series E and AI-type Nikkor lenses, the Nikon EM delivers quality images․ The FB-E case protects your camera, as described in the manual․
What is the Nikon EM?
The Nikon EM is a 35mm single-lens reflex (SLR) camera introduced in 1979․ It’s known as Nikon’s most affordable SLR, designed to be accessible to a wider range of photographers․
This camera, detailed in the Nikon EM owner’s manual, features both automatic aperture-priority exposure and full manual control․ It’s particularly well-suited for use with Nikon Series E lenses, though AI-type Nikkor lenses are also compatible․
The manual highlights its user-friendly design and robust build quality, making it a popular choice for both beginners and experienced photographers alike․
Key Features and Specifications
The Nikon EM boasts aperture-priority auto exposure and manual modes, as outlined in the manual․ It accepts Series E and AI-type Nikkor lenses․ Shutter speeds range from 2 seconds to 1/2000th of a second, plus Bulb mode․
Key specs include a 0․86x viewfinder magnification and a built-in self-timer․ The manual details its compatibility with the optional MD-12 motor drive․ It operates on two SR44 batteries, providing power for accurate exposure control․
Getting Started: Initial Setup
Begin by removing protective covers, as shown in the manual․ Insert batteries and load 35mm film following the manual’s instructions․ Attach your chosen lens securely․
Inserting Batteries
The Nikon EM requires two SR44 batteries for operation, detailed in the manual․ Locate the battery compartment on the camera’s bottom․ Open the compartment door and insert the batteries, observing correct polarity (+/-) as indicated․
Ensure batteries are securely seated․ Close the compartment door until it clicks shut․ Incorrect battery insertion will prevent camera function; consult the manual for diagrams․ Battery power impacts the shutter and light meter․
Loading Film
Loading film into the Nikon EM is straightforward, as illustrated in the manual․ Open the camera back by lifting the rewind knob․ Insert the 35mm film cartridge into the film chamber․ Pull the film leader across the camera and attach it to the take-up spool․
Advance the film using the film advance lever, ensuring proper engagement․ Close the camera back securely․ The manual details film loading steps and potential issues․
Attaching and Removing Lenses
Attaching a lens to your Nikon EM is simple․ Align the lens mounting index with the body’s index․ Gently push the lens in and rotate clockwise until it clicks into place․ The manual shows this clearly․
To remove, press the lens release button and rotate counterclockwise․ Lift the lens straight off․ Always use lens caps for protection, as detailed in the manual’s care section․

Understanding the Camera Controls
Explore the Nikon EM’s controls for optimal use․ The shutter speed selector, aperture control, and exposure mode selector are key, as explained in the manual․
Shutter Speed Selector
The shutter speed selector dictates how long the camera’s sensor is exposed to light․ On the Nikon EM, settings range from 2 seconds to 1/2000th of a second, plus Bulb (B) for extended exposures․
Refer to the manual; resetting from AUTO to M90 sets the speed to 1/90th second․ Accurate shutter speed selection is crucial for controlling motion blur and achieving proper exposure, especially in manual mode․
Understanding these settings, detailed in the manual, allows for creative control over your photography․
Aperture Control
Aperture control, managed via the lens, adjusts the lens opening, influencing both image brightness and depth of field․ Lower f-numbers (e․g․, f/1․8) create shallow depth of field, ideal for portraits, while higher f-numbers (e․g․, f/16) maximize sharpness throughout the scene․
The Nikon EM works seamlessly with Series E and AI-type Nikkor lenses, offering precise aperture adjustments․ Consult the manual for detailed explanations and creative applications․
Exposure Mode Selector (Auto & Manual)
The Nikon EM’s selector offers both automatic and manual exposure control․ In AUTO mode, the camera determines the optimal shutter speed․ For creative control, switch to manual (M) mode, setting both aperture and shutter speed independently․
Resetting from AUTO to M90 provides a 1/90 sec shutter speed․ Refer to the manual for a complete understanding of each mode and achieving desired exposure results․

Using the Viewfinder
The Nikon EM’s viewfinder displays crucial information for accurate focusing and exposure․ Consult the manual to understand all displayed elements and their functions․
Viewfinder Information Display
Understanding the display is key! The Nikon EM’s viewfinder presents essential data for precise photography․ You’ll find indicators for over/under exposure, aiding in correct settings․
The manual details the LED indicators – + and ─ – signaling exposure adjustments needed in Aperture Priority mode; A center dot confirms proper exposure․ Additionally, the viewfinder shows shutter speed (in manual mode) and confirms focus․ Refer to your manual for a complete breakdown of each element․
Focusing with the Viewfinder
Achieving sharp images relies on accurate focusing! The Nikon EM’s viewfinder features a split-image rangefinder for precise focusing․ Align the two images in the center of the viewfinder to achieve optimal sharpness․
The manual explains how to rotate the focusing ring on your lens until the split images merge․ Practice this technique for consistently sharp results․ Remember, proper focusing is crucial, especially when using a fast lens․ Consult the manual for detailed guidance․
Exposure Settings and Techniques
Master exposure for stunning photos! The Nikon EM offers Aperture Priority, Manual, and Shutter Priority (with MD-12) modes․ Refer to the manual for details․
Aperture Priority Mode
Aperture Priority allows you to select the desired aperture (f-stop) for controlling depth of field, while the camera automatically sets the shutter speed․ This mode is ideal for creative control over focus and background blur․
Consult the Nikon EM manual for specific instructions on setting the aperture ring on your lens․ The camera will display the calculated shutter speed in the viewfinder․ Remember to check this speed to ensure proper exposure, especially in low light!
Manual Exposure Mode
Manual Exposure grants full control over both aperture and shutter speed․ Set the shutter speed selector and aperture ring on your lens independently, as detailed in the Nikon EM manual․
Utilize the viewfinder’s exposure meter to achieve correct exposure․ Adjust settings until the meter indicates a balanced reading․ This mode requires practice but offers ultimate creative freedom․ Reset the shutter operation mode selector to ‘M90’ for a starting point․
Shutter Priority Mode (with MD-12 Motor Drive)
When using the MD-12 Motor Drive, the Nikon EM enables shutter priority operation․ Select your desired shutter speed, and the camera automatically sets the appropriate aperture for correct exposure, as explained in the manual․
The MD-12 facilitates continuous shooting, enhancing your ability to capture action․ Remember to check the viewfinder for the selected aperture value․ This mode balances speed and automatic exposure control․
Advanced Features
Explore features like Depth of Field Preview and the convenient Self-Timer Function․ Consult the manual for detailed instructions and optimal usage․
These tools enhance creative control, allowing for precise image composition and timing, as described in the Nikon EM documentation․
Depth of Field Preview
Utilizing the Depth of Field Preview allows you to visually assess the area of acceptable sharpness at your chosen aperture․ Press the preview lever located near the lens mount; this stops down the lens to the selected f-stop․
Observe the viewfinder to confirm the desired depth of field before capturing the image․ Remember to release the lever after previewing, as continuous use drains the battery․ The manual provides detailed diagrams illustrating this process, ensuring accurate results and creative control over your photographs․
Self-Timer Function
Engaging the Self-Timer enables a delayed shutter release, perfect for self-portraits or group photos․ Locate the self-timer lever on the camera’s front panel and slide it to the “T” position․ The shutter release button then initiates a 10-second delay․
A blinking LED confirms activation․ Pressing the shutter again during the countdown cancels the timer․ Consult the manual for visual guidance, ensuring successful self-timed shots and creative photographic opportunities․

Troubleshooting Common Issues
Facing problems? Refer to the manual for solutions to exposure or film advance issues․ Ensure lens compatibility for optimal performance and results․
Resetting the shutter mode selector to M90 can resolve certain operational hiccups, as detailed within the manual․
Exposure Problems
Incorrect exposure often stems from improper settings․ Consult the Nikon EM manual to verify the shutter speed selector is correctly positioned․
If images are consistently over or underexposed, double-check the aperture control and exposure mode selection (Auto or Manual)․ Resetting to M90, as the manual suggests, can sometimes resolve issues․
Ensure sufficient battery power, as low batteries can affect metering accuracy․ Refer to the manual’s troubleshooting section for further guidance and potential solutions․
Film Advance Issues
Difficulty advancing film often indicates a mechanical problem․ The Nikon EM manual details proper film loading procedures; ensure film is correctly seated․
Check for obstructions within the film chamber․ If the film isn’t advancing smoothly, avoid forcing it, as this could damage the camera․ Consult the manual for diagrams․
Low battery power can also hinder film advance, particularly when using the MD-12 motor drive․ Refer to the manual’s troubleshooting section for detailed assistance․
Lens Compatibility
The Nikon EM is primarily designed for use with Nikon Series E lenses, offering a cost-effective entry point․ However, the manual confirms compatibility with AI-type Nikkor lenses too․
Other lenses may function, but full compatibility isn’t guaranteed․ Always check the manual for specific lens requirements․ Proper mounting and removal, as shown in the manual, are crucial․
Ensure lenses are securely attached to avoid operational issues․ The manual provides guidance on adapting lenses, but functionality may vary․

Nikon EM Lenses
Explore lens options! The Nikon EM excels with Nikon Series E lenses and AI-type Nikkors, detailed in the manual․
These lenses provide full functionality and are ideal for various photographic styles․
Series E Lenses
Designed for the Nikon EM, Series E lenses offer a cost-effective entry point into the Nikon system, as highlighted in the manual․ These lenses were expressly engineered for compatibility, providing full functionality with the camera’s features․
While often simpler in construction than higher-end Nikkor lenses, they deliver excellent image quality and are perfect for learning photography․ The manual details their specifications and usage․
Expect sharp images and reliable performance from this versatile lens series․
AI-Type Nikkor Lenses
The Nikon EM is fully compatible with AI-type Nikkor lenses, offering a wider range of optical choices, as detailed in the manual․ These lenses provide superior build quality and advanced features compared to Series E lenses․
AI lenses allow for full aperture control from the camera body, enhancing creative possibilities․ The manual explains how to maximize their potential with the Nikon EM․
Expect exceptional sharpness and performance from these professional-grade lenses․

Maintenance and Care
Keep your Nikon EM in top condition! Regularly clean the body and lenses, following the manual’s guidance․ Proper care ensures longevity․
Gentle cleaning methods are recommended to avoid damage․ Refer to the manual for specific instructions․
Cleaning the Camera Body
Regularly wipe the Nikon EM’s exterior with a soft, dry cloth to remove dust and fingerprints․ For stubborn grime, slightly dampen the cloth with water – never use solvents!
Avoid excessive moisture near openings․ The manual advises against applying liquids directly to the camera․ Pay attention to the film compartment and viewfinder area․ A gentle brush can remove dust from crevices․ Inspect the battery compartment for corrosion and clean if necessary, consulting the manual for safety precautions․
Lens Care
Protect your Nikon EM lenses! Use a blower to remove loose dust․ For fingerprints, apply a lens cleaning solution to a microfiber cloth – never directly onto the lens․
Wipe gently in a circular motion․ The manual recommends avoiding harsh chemicals․ Regularly check for fungus, especially in humid environments․ Store lenses with caps on in a dry case․ Proper lens care, as detailed in the manual, ensures optimal image quality and longevity․
Resources and Further Information
Explore further! Download the Nikon EM manual PDF online․ Join online communities and forums for tips and support, enhancing your experience․
Nikon EM Manual PDF Download
Access the complete Nikon EM owner’s manual in PDF format! Several websites archive this valuable resource, offering a detailed guide to your camera’s functions․
Websites like orphancameras․com host the manual, providing page-by-page viewing and download options․ This PDF version covers everything from initial setup to advanced techniques․
Having the manual readily available ensures you can quickly reference settings, troubleshoot issues, and fully utilize the Nikon EM’s capabilities․ Download yours today!
Online Communities and Forums
Connect with fellow Nikon EM users! Online communities and forums are excellent resources for sharing knowledge, asking questions, and finding solutions․
These platforms offer a wealth of experience from photographers who have mastered the Nikon EM․ Discuss techniques, lens compatibility, and troubleshooting tips with enthusiasts․
Find support, share your photos, and deepen your understanding of this classic camera through collaborative learning within these vibrant online spaces․

Nikon MD-12 Motor Drive
Enhance your Nikon EM! The MD-12 Motor Drive enables continuous shooting․ Installation and operation details are found within the manual․
Benefit from increased speed and efficiency when capturing action sequences with this optional accessory․
Installation and Operation
Attaching the MD-12 requires a dedicated battery holder, inserted into the camera’s base․ Ensure proper alignment before securing it firmly․ The motor drive then slides onto the camera base and locks into place․
Operation is simple: a switch on the MD-12 activates continuous shooting․ The manual details settings for single or continuous advance․ Remember to use a dedicated battery for the motor drive itself, separate from the camera’s power source, for optimal performance․
Benefits of Using the MD-12
The MD-12 Motor Drive significantly enhances the Nikon EM’s capabilities․ It enables continuous shooting, perfect for capturing action sequences․ The manual highlights its usefulness for sports and fast-moving subjects․
Increased shooting speed reduces the risk of missing crucial moments․ It also minimizes camera shake during rapid film advance․ The drive’s operation is detailed within the manual, ensuring smooth and efficient use, improving your photographic workflow․
Compartment Case FB-E
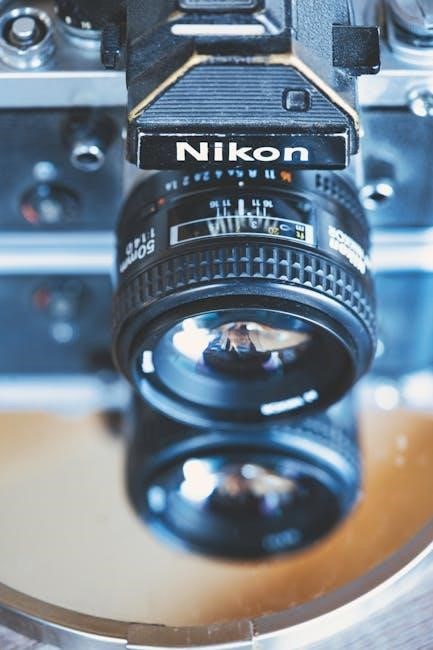
The FB-E case, specifically designed for the Nikon EM, accommodates the camera with a 50mm f/1․8 lens․ Refer to the manual for details!
It provides excellent protection during transport and storage, ensuring your Nikon EM remains safe․
Features and Usage
The FB-E Compartment Case is engineered to securely house your Nikon EM camera, particularly when fitted with a Nikon Series E 50mm f/1․8 lens․ This dedicated design ensures a snug and protective fit, safeguarding against bumps and scratches during travel or storage․
Its robust construction offers reliable protection, while the convenient design allows for easy access to the camera when needed․ Consult the Nikon EM manual for optimal case usage and care instructions, maximizing its protective benefits․
Protecting Your Nikon EM
Safeguarding your Nikon EM is crucial for longevity․ Utilize the specifically designed FB-E Compartment Case for secure storage and transport, preventing physical damage․ Regularly clean the camera body with a soft cloth, avoiding harsh chemicals․
Proper lens care, detailed in the manual, is also essential․ Always use lens caps when not in use and store lenses in a dry environment․ Following these steps ensures your Nikon EM remains in optimal condition․