Panasonic offers a diverse range of bread makers, including the SD-YR2550, SD-YR2540, SD-R2530, and SD-B2510. These versatile machines simplify baking, delivering fresh, homemade bread effortlessly.
Overview of Panasonic Bread Maker Models
Panasonic presents a comprehensive lineup of bread makers catering to diverse baking needs. The flagship SD-YR2550 boasts 31 pre-programmed settings, offering exceptional versatility. The SD-YR2540 closely follows with 32 automatic programs, ideal for various breads, doughs, and even jams. For a slightly simpler experience, the SD-R2530 provides 30 programs, while the SD-B2510 features 21.
Notably, the newer SD-PN100 mini breadmaker is designed for smaller households, producing 400g loaves to minimize waste. Recent discussions suggest the 2530, 2540, and 2550 models share core functionality, differing primarily in color options. These models aim to deliver quality and taste in every bake, simplifying the process of homemade bread.
Benefits of Using a Panasonic Bread Maker
Panasonic bread makers offer numerous advantages for home bakers. They provide convenience, automating the kneading, rising, and baking processes. Users enjoy fresh, homemade bread without the effort of traditional methods. The pre-programmed settings, ranging from basic loaves to sweet breads and doughs, simplify recipe execution.
Models like the SD-YR2550 and SD-YR2540 offer extensive program choices, while the SD-PN100 minimizes waste with smaller loaf sizes. These machines promote healthier eating by allowing control over ingredients, avoiding preservatives found in store-bought bread. Ultimately, a Panasonic bread maker delivers quality, taste, and convenience.

Understanding Your Panasonic Bread Maker
Panasonic bread makers boast intuitive designs with key components like the bread pan, kneading paddle, and a user-friendly control panel for easy operation.
Key Components and Parts
Panasonic bread makers consist of several essential parts working in harmony. The bread pan, typically non-stick, holds ingredients during baking. A kneading paddle, often removable, mixes and kneads the dough to perfection. The heating element ensures even baking, while the sensor monitors temperature for optimal results.
Models like the SD-YR2550 and SD-R2530 feature a durable housing. The lid seals in heat and moisture. A viewing window (not present in all models, like the SD-R2550 noted in reviews) allows monitoring. The control panel, discussed separately, manages settings. Finally, a power cord provides electricity, and some include a spare paddle or measuring tools.
Control Panel Explained
Panasonic bread maker control panels vary by model, but share common features. The SD-YR2540 boasts 32 programs, while the SD-B2510 offers 21. Buttons typically include ‘Start/Stop’, ‘Menu’, and ‘Crust Color’ selection (Light, Medium, Dark). A ‘Timer’ function allows delayed baking;
Program selection cycles through options like ‘Basic’, ‘Whole Wheat’, ‘Sweet’, and ‘Dough’. Digital displays show program number and baking time. Some models feature custom program settings for ingredient adjustments. The panel also indicates stages – kneading, rising, and baking. Refer to your model’s specific manual for detailed button functions and program descriptions.
Initial Setup and Preparation
Before first use, thoroughly clean the bread pan and kneading paddle with warm, soapy water. Wipe the machine housing with a damp cloth. Ensure the paddle is securely attached to the paddle shaft inside the bread maker. Place the machine on a stable, level surface, away from heat sources.
Plug in the bread maker. It may be necessary to run a practice cycle (without ingredients) to eliminate any manufacturing odors. Consult your model’s manual for specific instructions. Familiarize yourself with ingredient order – liquids first, then dry ingredients, with yeast added last, away from liquids.
Using Pre-Programmed Settings
Panasonic bread makers feature numerous pre-set programs for various breads, doughs, and even jams, simplifying baking with automated cycles and optimal results.
Basic Bread Setting
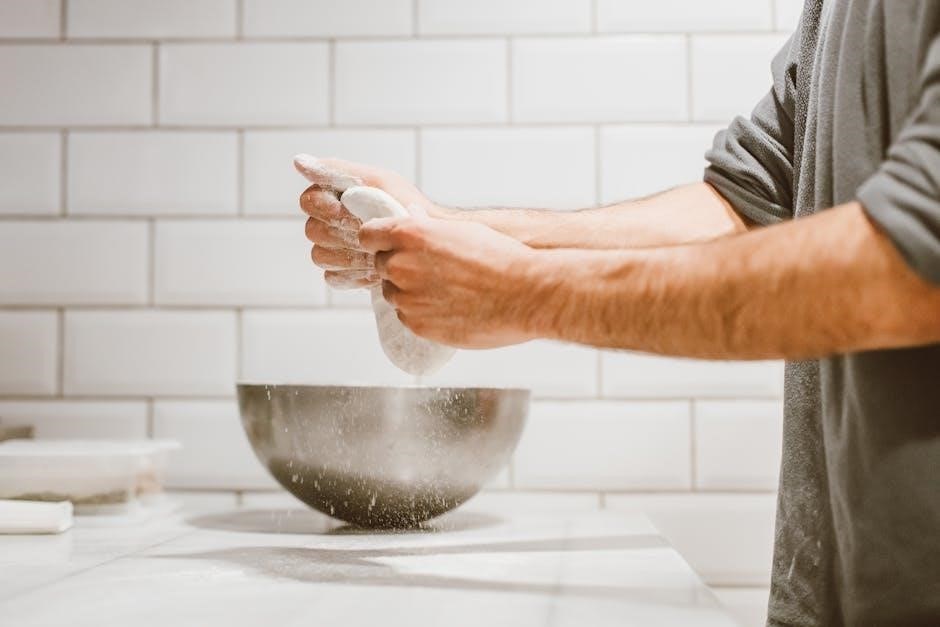
Panasonic’s Basic Bread setting is ideal for creating a classic loaf, perfect for sandwiches or toast. This program typically utilizes a standard baking cycle, suitable for most all-purpose or bread flours. Ensure ingredients are added in the order specified in your instruction manual – usually liquids first, then dry ingredients, with yeast added last, avoiding direct contact with liquids.
Select the desired loaf size (often 1.5lb or 2lb) and crust color (light, medium, or dark) before starting the cycle. The machine handles kneading, rising, and baking automatically. While the Basic setting is straightforward, achieving optimal results depends on accurate ingredient measurements and fresh yeast. Remember that Panasonic models like the SD-YR2550 and SD-R2530 offer variations within this basic program, potentially including options for a quicker bake.
Whole Wheat Bread Setting
Panasonic bread makers feature a dedicated Whole Wheat setting designed for denser, more nutritious loaves. This program adjusts kneading and rising times to accommodate the unique properties of whole wheat flour, which absorbs more liquid. Using 100% whole wheat flour can result in a heavier texture; consider blending it with bread flour for a lighter loaf.
The instruction manual recommends adding a tablespoon of vital wheat gluten per cup of whole wheat flour to improve rise and texture. Select your preferred loaf size and crust color before initiating the cycle. Models like the SD-YR2540 and SD-R2530 may offer variations within this setting, such as a honey wheat option. Proper hydration is crucial; you may need to slightly increase the liquid amount compared to white bread recipes.
Sweet Bread & Dessert Settings
Panasonic bread makers excel beyond basic loaves, offering specialized settings for sweet breads, cakes, and even jams. The Sweet Bread program utilizes a slower kneading process and adjusted rising times to develop a softer, richer texture ideal for brioche or challah. Dessert settings, available on models like the SD-YR2550, are designed for cakes and other sweet treats.
The instruction manual advises reducing yeast slightly when using these settings, as sugar feeds yeast and can cause over-proofing. Ensure ingredients are accurately measured, especially sugar and butter. Jam-making programs allow for homemade preserves directly within the bread maker. Always refer to the manual for specific ingredient limitations and recommended recipes for optimal results.

Customizing Your Bread Recipes
Panasonic bread makers allow ingredient adjustments; experiment with quantities and additions like fruits, nuts, or seeds to personalize your loaves and baking creations.
Adjusting Ingredient Quantities
Panasonic bread makers offer flexibility in recipe customization, allowing you to adjust ingredient quantities to suit your preferences and dietary needs. While the provided recipes are a great starting point, feel free to experiment! Generally, slight adjustments to flour or liquid amounts won’t drastically alter the outcome, but significant changes can affect the loaf’s texture and rise.
For a softer crust, increase the liquid by a tablespoon. For a firmer loaf, reduce it slightly. When working with whole wheat flour, you might need to add a little extra liquid as it absorbs more moisture. Always measure ingredients accurately for consistent results. Remember that different brands of flour can also vary in absorption rates, so adjustments may be necessary over time as you become familiar with your machine and ingredients.
Adding Fruits, Nuts, and Seeds
Panasonic bread makers excel at incorporating delicious additions like fruits, nuts, and seeds into your loaves. For best results, add these ingredients during the second kneading cycle, when signaled by the machine – typically indicated by an audible beep. This prevents them from being crushed during the initial mixing.
Dried fruits should be chopped into smaller pieces to ensure even distribution. Nuts can be added whole or chopped, depending on your preference. Seeds, like flax or sunflower, can be sprinkled directly into the bread pan. Avoid adding excessive amounts, as this can interfere with the dough’s rise. A general guideline is to limit additions to approximately 1-1.5 cups total for a standard loaf size.
Gluten-Free Baking Options
Panasonic bread makers, particularly newer models like the SD-YR2550 and SD-YR2540, offer dedicated gluten-free programs. These programs are specifically designed to accommodate gluten-free flour blends, which often require different kneading and rising times. Always use a high-quality gluten-free bread flour mix that includes xanthan gum, essential for binding and structure.
Ensure your bread pan and all utensils are thoroughly cleaned to avoid cross-contamination. Follow the recipe instructions carefully, as gluten-free doughs tend to be wetter. You may need to adjust liquid quantities slightly. Monitor the baking process closely, as gluten-free loaves can brown faster.

Troubleshooting Common Issues
Panasonic bread makers can sometimes experience loaf collapse, uneven baking, or a stuck paddle. Addressing these issues often involves adjusting ingredients or checking the machine.
Loaf Collapses or Doesn’t Rise
If your loaf collapses or fails to rise adequately in your Panasonic bread maker, several factors could be at play. Firstly, ensure the yeast is fresh and properly activated; expired yeast won’t provide sufficient lift. Secondly, precise measurements are crucial – too much liquid can weaken the dough structure, leading to collapse.
Conversely, insufficient liquid hinders gluten development, also impacting rise. Check ingredient order, following the manual’s guidance. Using the correct flour type is also vital; bread flour has higher protein content for better structure. Finally, ambient temperature affects yeast activity; a cold environment may slow down the rising process. Consider a warmer location or a slightly longer proofing time.
Uneven Baking or Burning
Experiencing uneven baking or burning with your Panasonic bread maker often points to a few common issues. Firstly, ensure ingredients are evenly distributed within the pan before starting the cycle. Uneven mixing can lead to localized burning. Secondly, check the heating element for any obstructions or buildup, which can cause hotspots.
Also, verify you’ve selected the appropriate crust color setting; a darker setting increases baking time and heat. If using whole wheat flour, it tends to brown faster, so consider a lighter crust setting. Finally, avoid opening the lid during baking, as this releases heat and disrupts the baking process, potentially causing a collapse or uneven bake.
Paddle Stuck in Bread
A common issue with Panasonic bread makers is the kneading paddle becoming stuck in the finished loaf. This typically happens when the dough is particularly sticky or hasn’t fully released from the paddle during the cooling cycle. To avoid this, ensure accurate ingredient measurements, especially liquids.
Allow the loaf to cool completely in the pan before attempting removal. Gently loosen the paddle with a silicone spatula or utensil before inverting the pan. If it remains stuck, avoid forceful removal, as this can damage the paddle or the bread pan’s non-stick coating. A short cooling period can often resolve the issue.

Cleaning and Maintenance
Regular cleaning ensures optimal performance and longevity of your Panasonic bread maker. Always unplug the machine before cleaning, and wipe down the housing with a damp cloth.
Cleaning the Bread Pan
Thoroughly cleaning the bread pan after each use is crucial to prevent residue buildup and maintain bread quality. Allow the pan to cool completely before removing it from the bread maker. Wash the bread pan with warm, soapy water, ensuring all crumbs are removed.
For stubborn residue, soak the pan in warm water for a period before washing. Avoid using abrasive cleaners or scouring pads, as these can damage the non-stick coating. The paddle, often removable, should also be washed with soap and water. Ensure both the pan and paddle are completely dry before reassembling and storing. Proper cleaning extends the lifespan of your Panasonic bread maker and ensures consistently delicious results.
Cleaning the Machine Housing
Regularly cleaning the exterior of your Panasonic bread maker maintains its appearance and prevents dust accumulation. Always unplug the machine and allow it to cool completely before cleaning. Use a soft, damp cloth to wipe down the housing. Avoid using harsh chemicals, abrasive cleaners, or excessive water, as these can damage the finish.
Pay attention to the control panel and surrounding areas, gently removing any crumbs or spills. For hard-to-reach areas, a soft brush can be helpful. Ensure the machine is completely dry before plugging it back in. Consistent cleaning contributes to the longevity and hygienic operation of your bread maker, ensuring years of enjoyable baking.
Long-Term Storage
Preparing your Panasonic bread maker for extended storage requires careful attention. Ensure the machine is thoroughly cleaned and completely dry before packing it away. Remove the bread pan and kneading blade, washing them separately and ensuring they are also dry. Store these components inside the bread pan to prevent loss.
Place the machine in its original packaging, if available, or use a sturdy box with sufficient padding to protect it from damage. Store in a cool, dry place, away from direct sunlight and extreme temperatures. Avoid stacking heavy items on top of the bread maker during storage to prevent potential issues.

Advanced Features & Models
Panasonic offers models like the SD-YR2550, SD-YR2540, SD-R2530, and SD-B2510, boasting numerous programs for breads, doughs, jams, and even cakes!
SD-YR2550 Model Details
The Panasonic SD-YR2550 stands out as a premium automatic bread maker, currently available at Amazon for $299.99. This model boasts an impressive 31 pre-set programs, offering exceptional versatility for baking enthusiasts. Users can effortlessly create a wide array of breads, including whole wheat varieties, as well as pizza doughs, brioche, and even homemade jams.
Reviewers highlight its functionality, though some note that the loaves can occasionally be lumpy. A key feature missing for some is a viewing window, which the Breville Custom Loaf Maker provides as an alternative. Despite this, the SD-YR2550 remains a strong contender, delivering quality and convenience for homemade baking.
SD-YR2540 Model Details
The Panasonic SD-YR2540 is a highly capable bread maker, packed with a remarkable 32 automatic programs. This extensive selection allows bakers to create authentic, fresh breads – from classic whole wheat loaves to delicate brioche and even sweet cakes. Beyond bread, it expertly handles pizza doughs, jams, and various other doughs, expanding culinary possibilities.
Positioned alongside the SD-YR2550, SD-R2530, and SD-B2510 in Panasonic’s lineup, the SD-YR2540 offers a comprehensive baking experience. Reddit discussions suggest that the 2530, 2540, and 2550 models share a core design, differing primarily in color options and potentially minor feature variations, making it a strong choice.
SD-R2530 Model Details
The Panasonic SD-R2530 bread maker stands as a reliable option within Panasonic’s diverse range, offering 30 automatic programs for versatile baking. It empowers users to create a wide array of breads, including whole wheat varieties, alongside pizza doughs and even jams, catering to diverse culinary preferences.
Notably, online discussions, particularly on Reddit, indicate a strong similarity between the SD-R2530, SD-YR2540, and SD-YR2550 models. These appear to share a fundamental design, with distinctions primarily revolving around color choices and potentially minor feature adjustments. This suggests the SD-R2530 provides excellent value and functionality.

Comparing Panasonic Models
Panasonic offers various models like the SD-R2550 versus SD-YR2540, and the older SD-B2510 compared to newer options, each with unique features.
SD-R2550 vs. SD-YR2540
Panasonic’s SD-R2550 and SD-YR2540 are both highly capable bread makers, but key differences exist. The SD-R2550, reviewed as a versatile machine with 20 pre-set programs, lacks a viewing window, which some users may find inconvenient. Conversely, the SD-YR2540 boasts an impressive 32 automatic programs, offering greater flexibility for diverse baking needs.
While both models deliver fresh bread, the SD-YR2540’s expanded program selection allows for more authentic recipes, including various breads, pizza doughs, brioche, cakes, and even jams. Some sources suggest the 2530, 2540, and 2550 share a core design, differing primarily in color and potentially bundled options. Ultimately, the best choice depends on prioritizing program variety versus a viewing window.
SD-B2510 vs. Newer Models
Panasonic’s SD-B2510, while still a capable bread maker with 21 automatic programs, represents an earlier generation compared to models like the SD-YR2550 and SD-YR2540. Newer models significantly expand program options; the YR2540, for instance, offers 32 programs, enabling a wider range of baking possibilities, including specialized breads, doughs, and even cakes and jams.
The SD-B2510 remains a solid choice for basic bread making, but users seeking greater versatility and recipe options may prefer investing in a newer model. While core functionality remains consistent across the range, the increased programmability of the YR series provides enhanced control and convenience for experienced bakers and those eager to experiment.
Mini Breadmaker SD-PN100 Features
Panasonic’s SD-PN100 mini bread maker is specifically designed for smaller households, boasting a 400g capacity – ideal for individuals or couples. This compact appliance minimizes food waste by allowing users to bake manageable portions of fresh bread. It’s a convenient solution for those wanting homemade bread without the bulk of larger loaves.
Despite its size, the SD-PN100 doesn’t compromise on functionality, offering various pre-set programs for different bread types. It’s a space-saving alternative to larger Panasonic models like the SD-YR2550, providing a simple and efficient way to enjoy freshly baked bread daily.
Recipes and Baking Tips
Panasonic bread makers excel beyond basic loaves; explore recipes for white bread, whole wheat variations, and even homemade jams, enhancing your baking experience.
Basic White Bread Recipe
Yields: 1 loaf (approximately 1.5 lbs)
Prep time: 10 minutes
Cook time: Approximately 3 hours (depending on model and setting)
Ingredients: 2 1/2 cups (300g) bread flour, 1 teaspoon salt, 2 tablespoons sugar, 1 tablespoon vegetable oil, 1 cup (240ml) water, 2 teaspoons active dry yeast.
Instructions: Add ingredients to the bread pan in the order listed above, ensuring yeast doesn’t directly contact liquid. Select the “Basic Bread” setting on your Panasonic bread maker (SD-YR2550, SD-YR2540, etc.). Choose loaf size (1.5lb). Press start. Once the cycle completes, carefully remove the loaf from the pan using oven mitts. Let cool completely before slicing and enjoying your freshly baked bread!
Whole Wheat Bread Recipe
Yields: 1 loaf (approximately 1.5 lbs)
Prep time: 10 minutes
Cook time: Approximately 3 hours 30 minutes (depending on model and setting)
Ingredients: 1 1/2 cups (180g) whole wheat flour, 1 cup (120g) bread flour, 1 teaspoon salt, 2 tablespoons honey, 1 tablespoon vegetable oil, 1 cup (240ml) warm water, 2 teaspoons active dry yeast.
Instructions: Add ingredients to the bread pan in the order listed, ensuring yeast doesn’t touch liquid. Select the “Whole Wheat Bread” setting on your Panasonic bread maker (SD-YR2550, SD-YR2540, etc.). Choose loaf size (1.5lb). Press start. Whole wheat requires a longer rise time. Once complete, remove the loaf carefully and let cool before slicing. Enjoy a nutritious and flavorful whole wheat loaf!
Jam Making with Your Bread Maker
Yields: Approximately 4 cups of jam.
Prep time: 15 minutes
Cook time: Approximately 1 hour (depending on model).
Ingredients: 4 cups crushed fruit (strawberries, raspberries, etc.), 4 cups granulated sugar, 2 tablespoons lemon juice. Adjust sugar based on fruit sweetness.
Instructions: Combine all ingredients in the bread pan. Select the “Jam” setting on your Panasonic bread maker (SD-YR2550, SD-YR2540, SD-R2530). Ensure the pan is securely placed. The machine will mix and cook the jam. Once finished, carefully remove the hot pan. Pour jam into sterilized jars and seal. Enjoy homemade jam on toast or pastries!